
Neverness to Everness Character Setup
1. Opening the Setup Wizard
Section titled “1. Opening the Setup Wizard”- Press
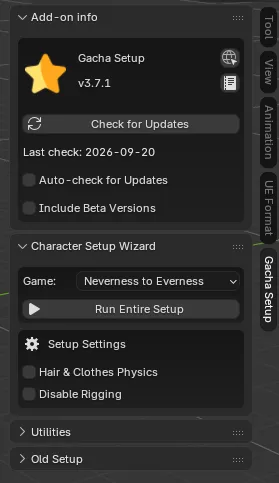
Nin the 3D Viewport to open the sidebar. - Navigate to the Character Setup Wizard tab.
- In the Game drop-down menu, select Neverness to Everness.
2. Importing Your Character
Section titled “2. Importing Your Character”You can set up your model in one click using Run Entire Setup or step-by-step via Old Setup.
- (Optional) Under Setup Settings, enable Hair & Clothes Physics to add dynamic physics to the hair and clothing. Enable Disable Rigging to skip rig generation and import materials + outlines only.
- Click Run Entire Setup (or Set Up Character under Old Setup).
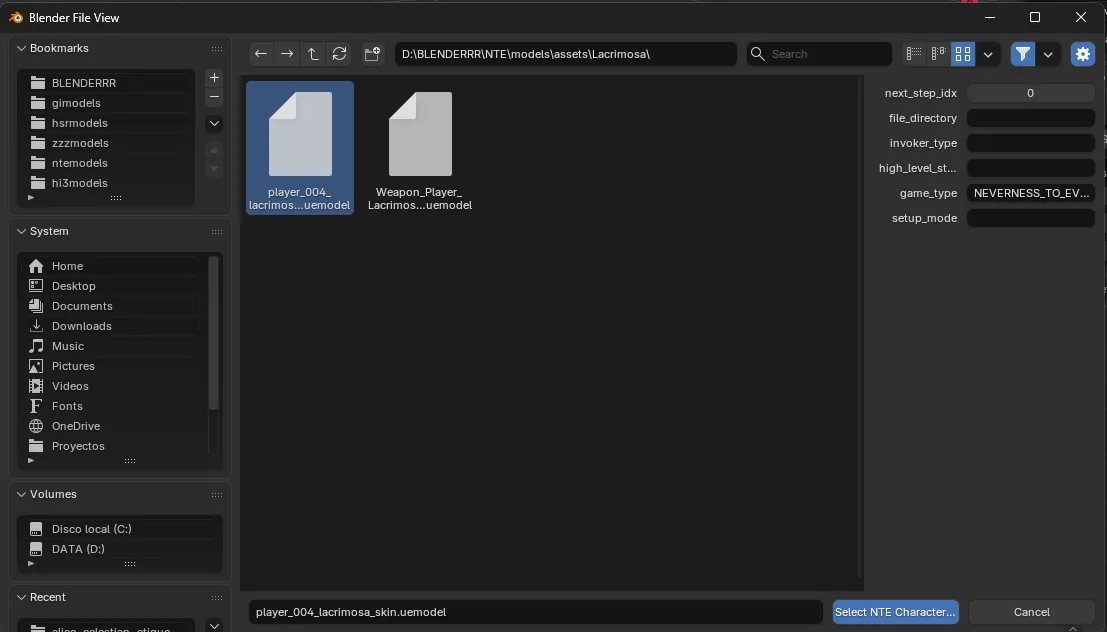
- A file browser window will appear. Navigate to your character folder containing the
.fbxmodel and textures. - Click Select NTE Character.
3. Automated Setup Pipeline
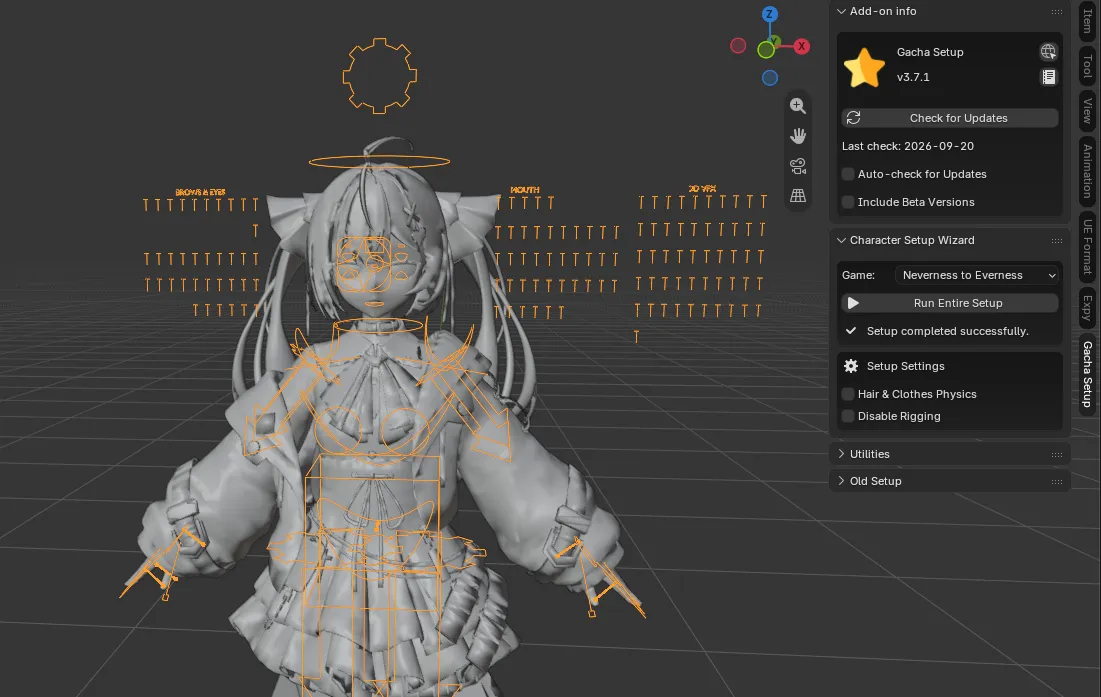
Section titled “3. Automated Setup Pipeline”When running the setup, the add-on executes the following automated steps for Neverness to Everness:
- Set Up Character: Imports the
.fbxmesh, cleans vertex groups, and standardizes bone hierarchies. - Set Up Materials: Replaces default Blender materials with custom NTE Toon Shader nodes, binding diffuse, lightmap, and color ramp textures.
- Set Up Outlines: Applies geometry-node inverted-hull outline modifiers to all character meshes for crisp line art rendering.
- Fix Transformations: Resets location, rotation, and scale transformations while linking facial drivers to light vectors.
- Rig Character: Configures control shapes and facial bone drivers.
- Finish Setup: Switches Color Management to Standard to preserve raw texture color accuracy.
4. Viewport Shading & Compositor Settings
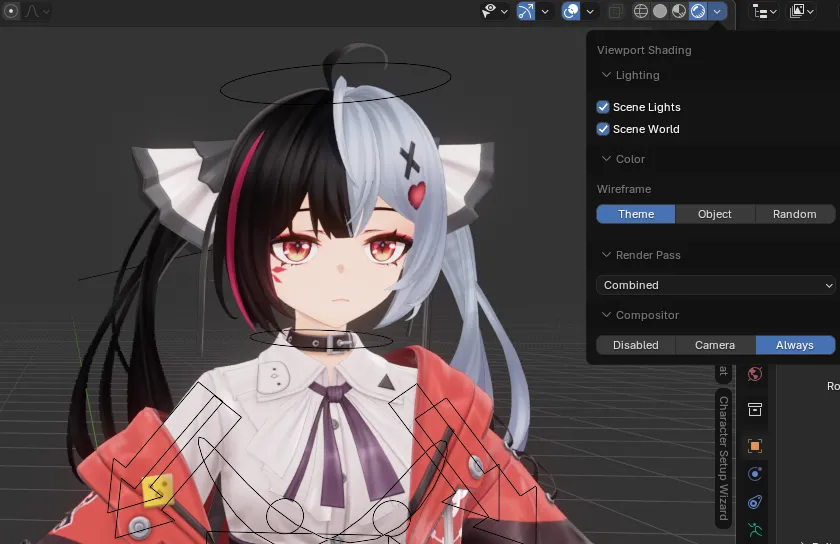
Section titled “4. Viewport Shading & Compositor Settings”To display NTE toon shaders and real-time head shadow compositing in the viewport:
- Enter the Compositing workspace from the top menu bar in Blender.
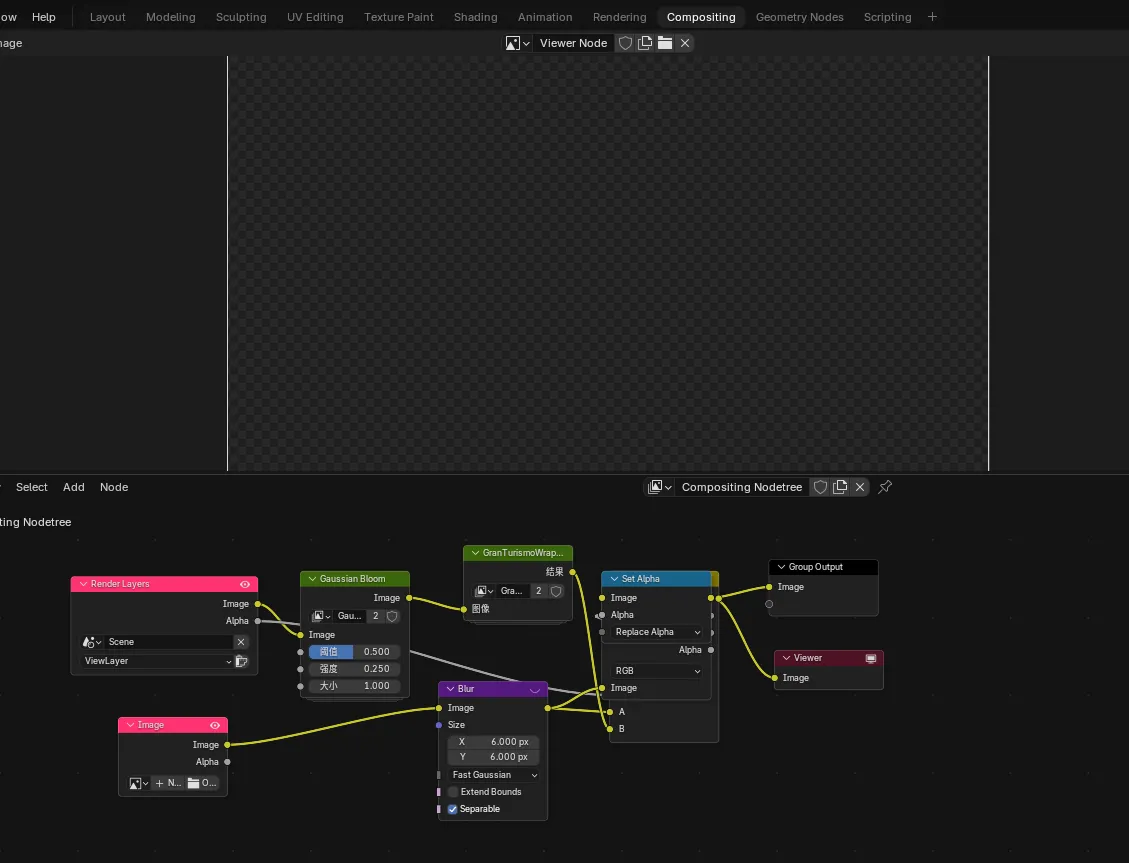
- Move the Alpha node to disconnect it from Group Output and Viewer, and connect the Mix node output directly into Group Output and Viewer.
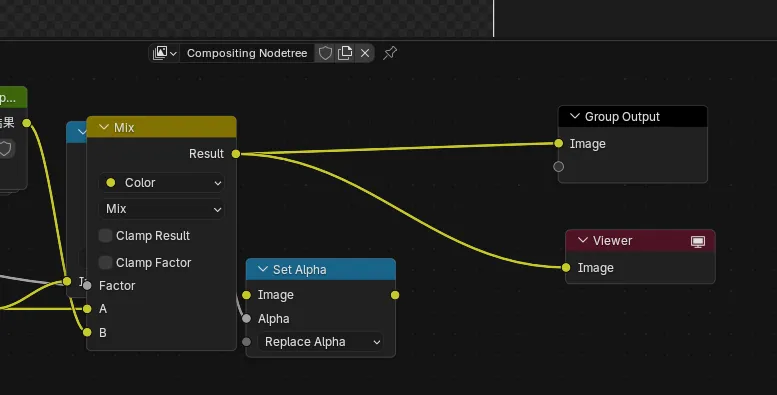
- Return to the Layout workspace in the top bar, open the Viewport Shading menu, and set Compositor to Always (or Camera).